I have always loved pottery and dishes. One of my earliest memories was playing with a metal jello mold on the kitchen floor of our house in Oklahoma City. We moved away from Oklahoma when I wasn’t quite 3, so it was definitely a long time ago. I can remember countless tea sets, pots and pans, and even a picnic set over the years–I just really like dishes.
I really loaded up when we lived in Japan, and especially fell in love with the small rice bowls and the small, bubbly textured Okinawa glass. I use them for everything; trinkets in my girls’ rooms, my bathroom, and candy on the cabinet in our front hallway. So, when I found a tutorial for making a ring dish, I couldn’t wait to try it. They’re easy, beautiful, and best of all, completely customizable. Try them, and let me know how they turn out. Better yet, use the hashtag #eclecticyellowhouse on Instagram to show me your creations! Take a look at this lovely:

Marbled Polymer Ring Dish
Supplies:
Polymer Clay (we used Sculpey)
Metallic Paint (we used Martha Stewart craft paint)
Sealant (either Sculpey brand glossy or matte, or ModPodge)
Cutting tools, rolling pin, parchment, plastic wrap bowls or containers to bake the bowls in.
Start by choosing several colors of clay. We stuck to four or five colors, but you can choose as many as you want. Choose the color you want to be your main color. Roll two cylinders of clay, slightly narrower than the width of your pinkie finger. Choose additional colors, rolling a cylinder of each, making them narrower than the first cylinders. Choose a color to offset the marbling, such as black or metallic, and make a very narrow cylinder. Since this is only accenting, it helps to keep it small. You should have something that looks like this:

I worked on parchment paper to make things easier. Stack the cylinders together, pressing lightly to make them stick. Place the two base color cylinders on opposite sides of the stack. It will look like this:

Using both hands, gently twist the cylinders until they look like a rope, about two or three turns. Don’t press together, just twist. You’ll have something like this:

Twist a little tighter and roll with the palm of your hand to smooth the rope. You’ll have something like this:

Bend in half, and twist again. Repeat rolling with the palm of your hand until the cylinder is smooth and colors are beginning to marble. You can repeat this step a couple more times, until the rope is marbled to your liking, but stopping before the colors begin to blend. This is where I stopped:

Preheat the oven to 275 degrees. Take the rope and coil or twist into a ball. Place the plastic wrap over the ball, and press flat with the palm of your hand. Roll with a rolling pin, slowly flattening the clay. Pick up the clay periodically so it doesn’t stick to the parchment. You’ll see the design emerging as you roll the clay. This is the fun and the unexpected part! Each bowl will be unique and beautiful.
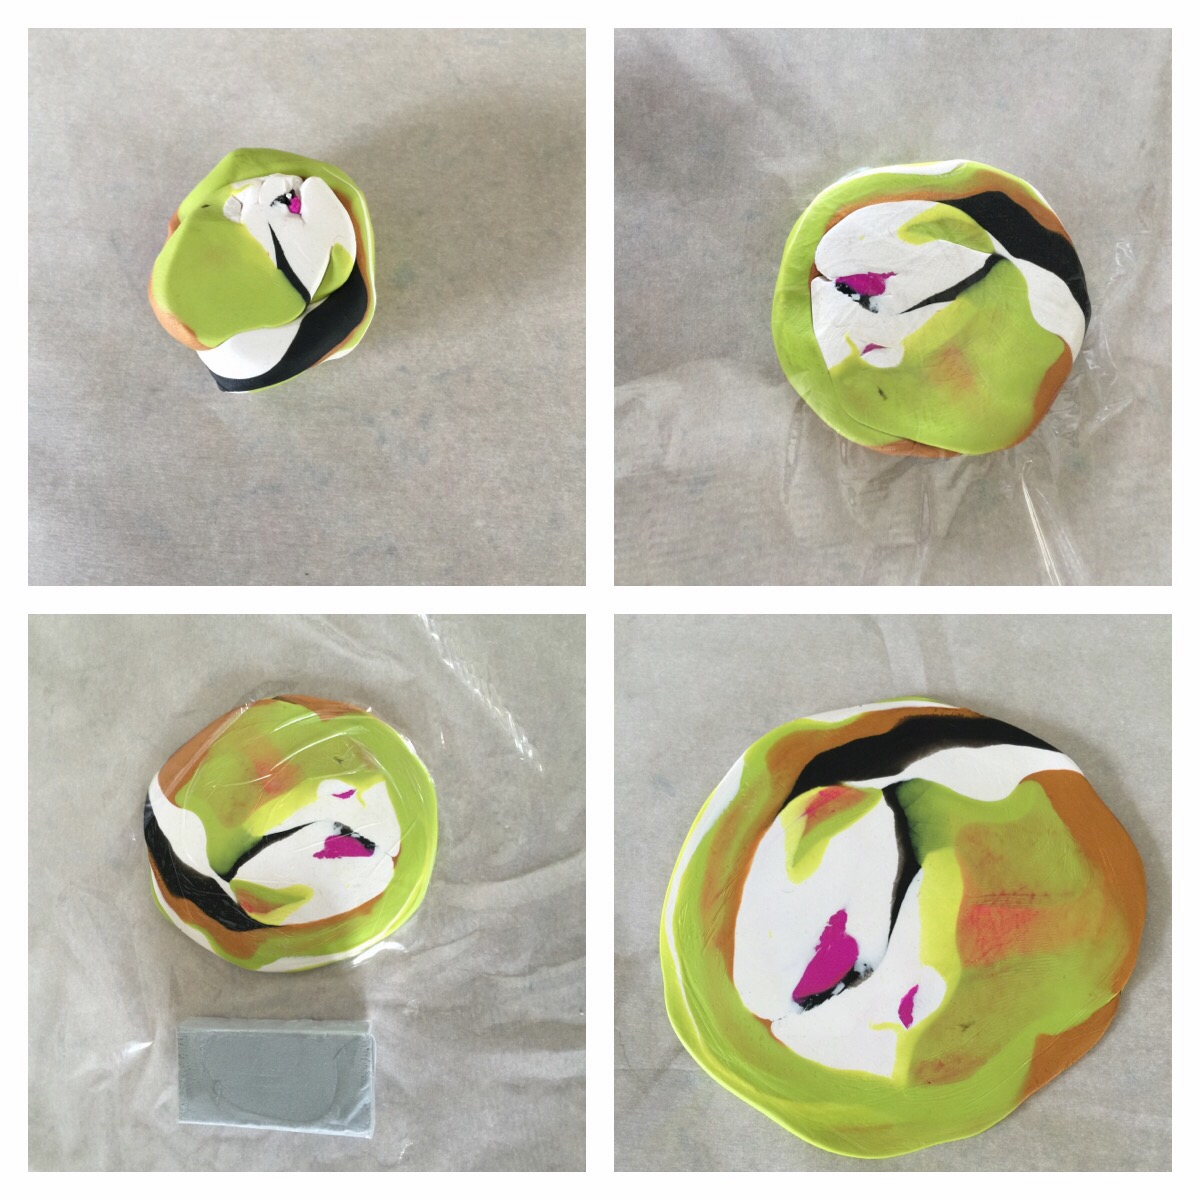
When the ball is about 5 inches in diameter, it is ready to bake. Decide if you want the edges of the bowl smooth or rustic, and if you want it smooth, use a cutting tool (knife, clay cutter) to make a clean circle. Gently drape the circle evenly into a small bowl like this:

Bake in the preheated oven for 15-20 minutes. Take care removing the bowl from the oven, as it and the clay will remain hot for quite awhile. Let cool completely, and it will easily pop out of the glass bowl. Use the metallic paint to paint the edges of the bowl, and when that’s dry, seal using the sealant or ModPodge. Let dry completely before using. These are not food safe, so use for rings, earrings, extra buttons or beads, etc. We made several in the span of about an hour. Here’s what we got:
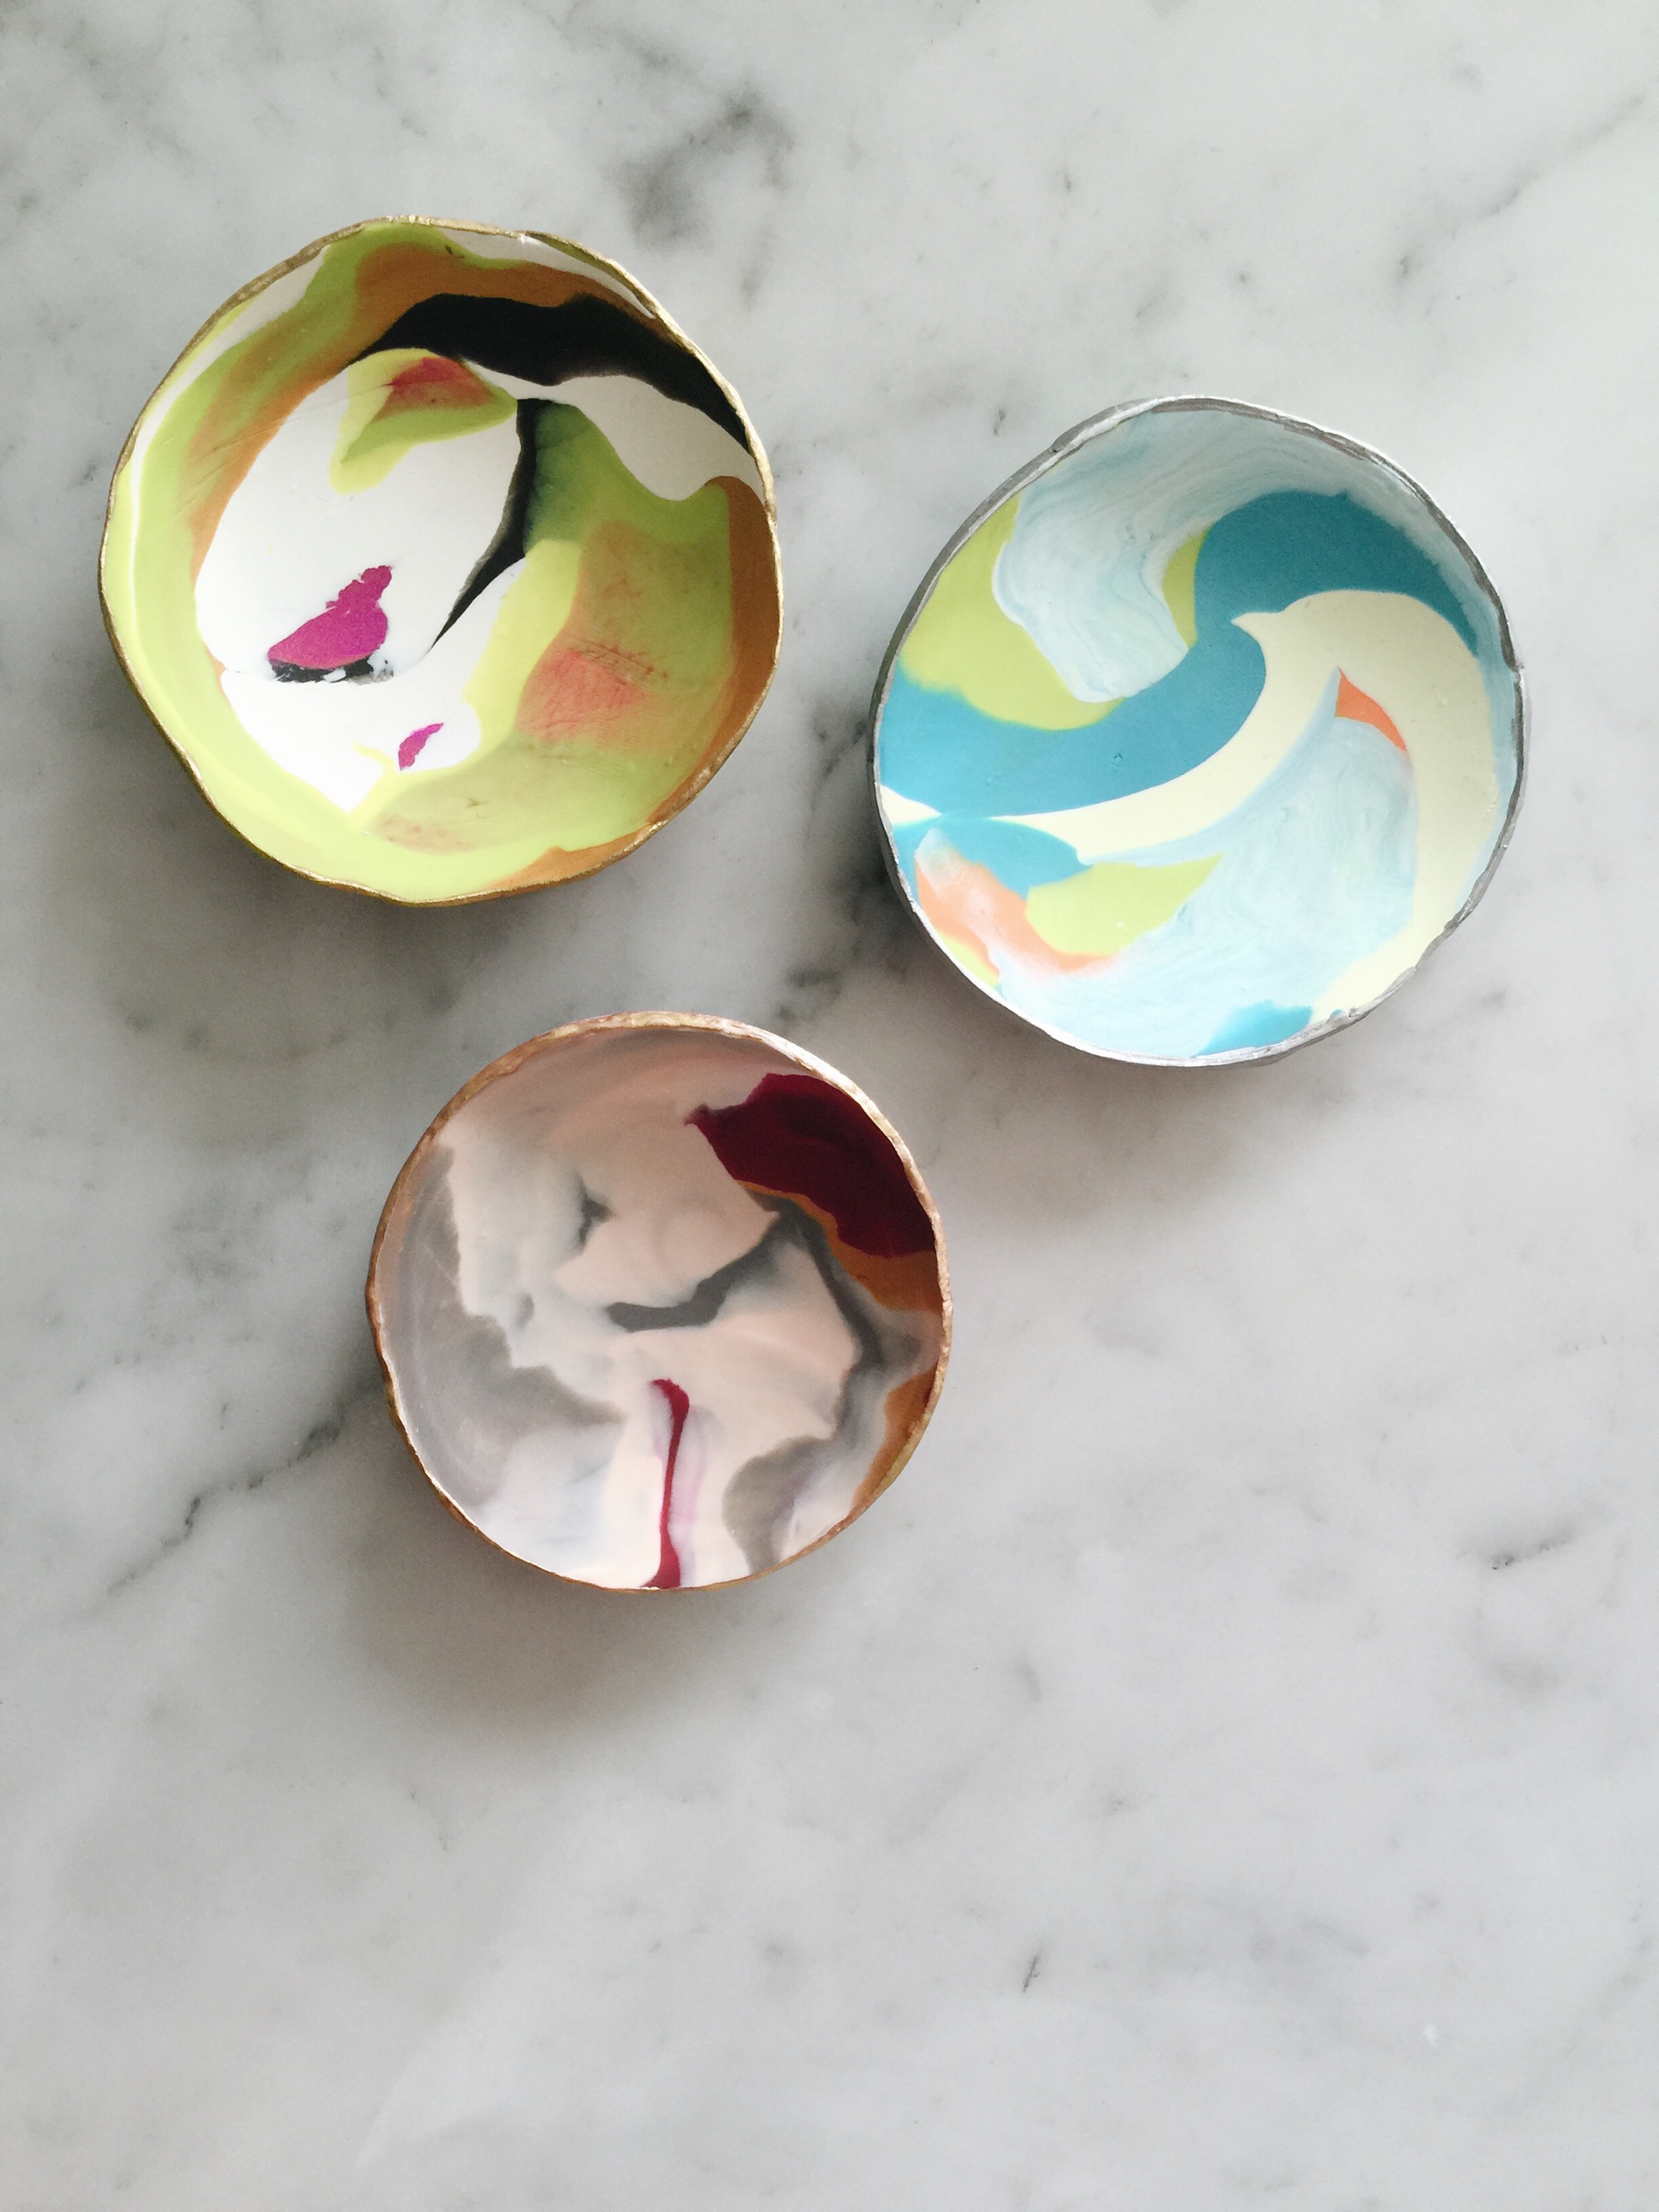
So pretty, and so unpredictably, beautifully unique!

Grab a couple of packs of clay, maybe a buddy or two, and create away! And if you get carried away making bowls, wrap up a couple and give them away for birthdays or Christmas. Either way, it’s a great DIY and a fun way to get creative for an afternoon. Now, go and create something lovely!

This was so much fun to make! I suggest making several with friends.
Yes it was fun! Glad you could make them with us!
Oh, how truly beautiful! Love these. I will have to give this a try =)
Thank you, Keia! Let me know if you make them and take photos of how they turn out!
Bowls!!! They are amazing looking!
Thank you!